> ## Documentation Index
> Fetch the complete documentation index at: https://docs.pamir.ai/llms.txt
> Use this file to discover all available pages before exploring further.
# Device Setup
> What to do once you receive the device
## Step 1 : Power on the device
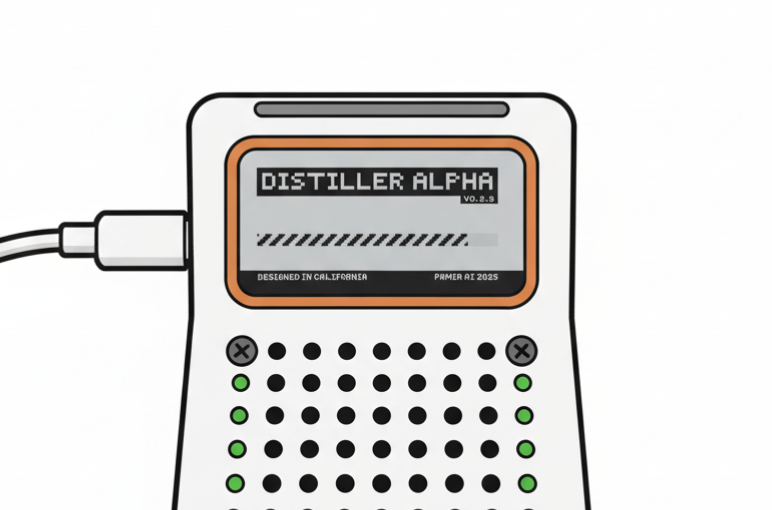
To power on the device, connect it to the provided power supply using the first USB-C port on the left side of the device.
 > Note, please use the power charger come with the device.
Once powered on, wait for the loading screen to finish
> Note, please use the power charger come with the device.
Once powered on, wait for the loading screen to finish
 ## Pamir Agent User : Download IOS App (skip to next step if you have the openclaw version)
Download the app on testflight : [https://testflight.apple.com/join/AghUMmcZ](https://testflight.apple.com/join/AghUMmcZ)
If you want the Desktop app : [https://github.com/pamir-ai-pkgs/manifest/releases/tag/v0.2.4](https://github.com/pamir-ai-pkgs/manifest/releases/tag/v0.2.4)
> if you want to switch to our software. tell your agent to run this command for you on the distiller device : sudo distiller-update check && sudo distiller-update apply
## Step 2 : Initial Network Setup
### First-Time WiFi Configuration
## Pamir Agent User : Download IOS App (skip to next step if you have the openclaw version)
Download the app on testflight : [https://testflight.apple.com/join/AghUMmcZ](https://testflight.apple.com/join/AghUMmcZ)
If you want the Desktop app : [https://github.com/pamir-ai-pkgs/manifest/releases/tag/v0.2.4](https://github.com/pamir-ai-pkgs/manifest/releases/tag/v0.2.4)
> if you want to switch to our software. tell your agent to run this command for you on the distiller device : sudo distiller-update check && sudo distiller-update apply
## Step 2 : Initial Network Setup
### First-Time WiFi Configuration
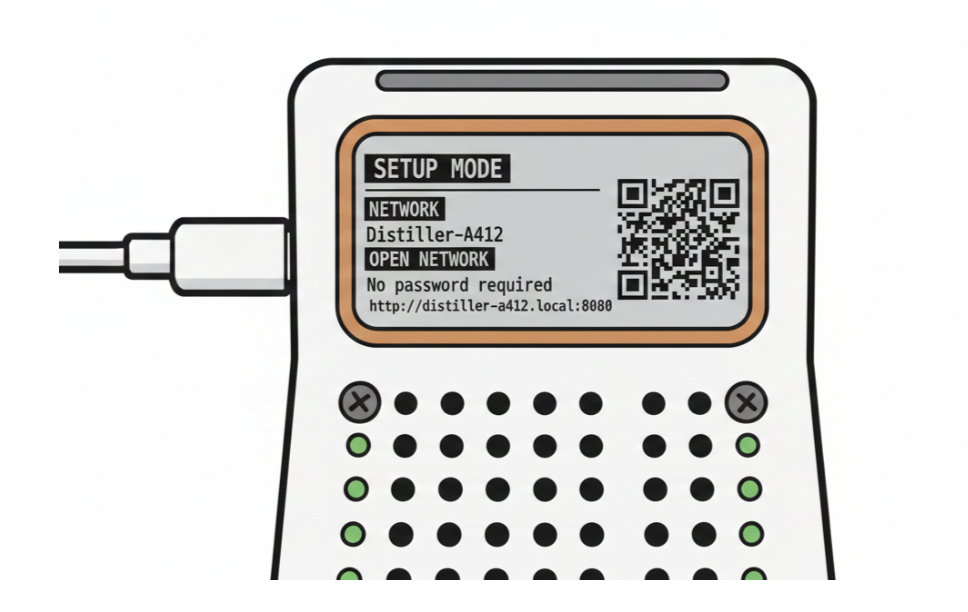 1. When the device has never been connected to your network, it will automatically prompt you to scan a QR code
2. Scan the QR code will auto connect your phone to the device's Access point.
3. A captive website should pop up for you to select and enter your WiFi network credentials, if not, you can visit the website manually.
4. Once setup is complete, the device will connect to the network and display a new QR code
> To reset wifi, visit [**http://your-device-ip:8080/**](http://your-device-ip:8080/)
## **Accessing Clawd Bot**
1. When the device has never been connected to your network, it will automatically prompt you to scan a QR code
2. Scan the QR code will auto connect your phone to the device's Access point.
3. A captive website should pop up for you to select and enter your WiFi network credentials, if not, you can visit the website manually.
4. Once setup is complete, the device will connect to the network and display a new QR code
> To reset wifi, visit [**http://your-device-ip:8080/**](http://your-device-ip:8080/)
## **Accessing Clawd Bot**
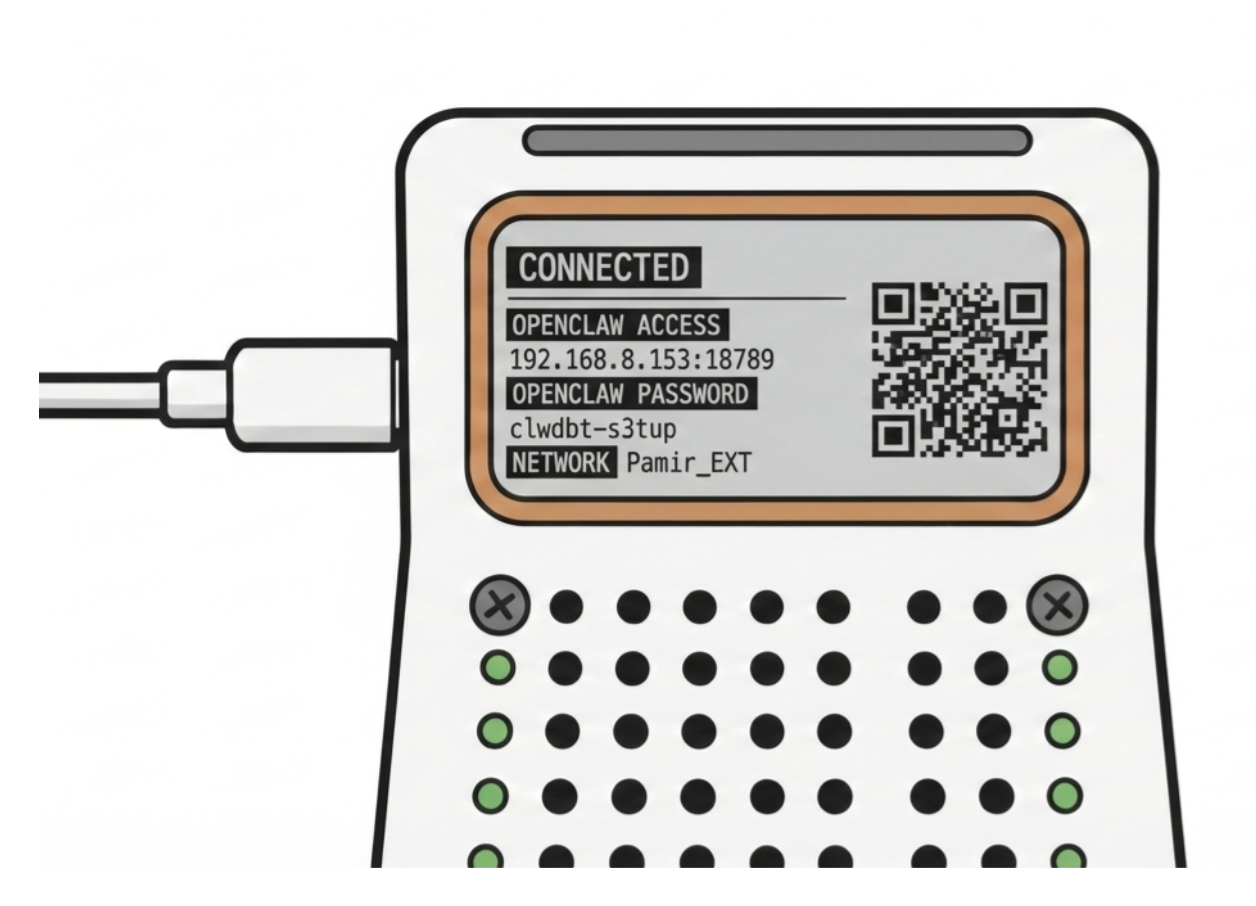 * Scan the QR code and send that link to your laptop.
or
* Type in the local IP address directly into your browser.
### **Insert Password**
* Scan the QR code and send that link to your laptop.
or
* Type in the local IP address directly into your browser.
### **Insert Password**
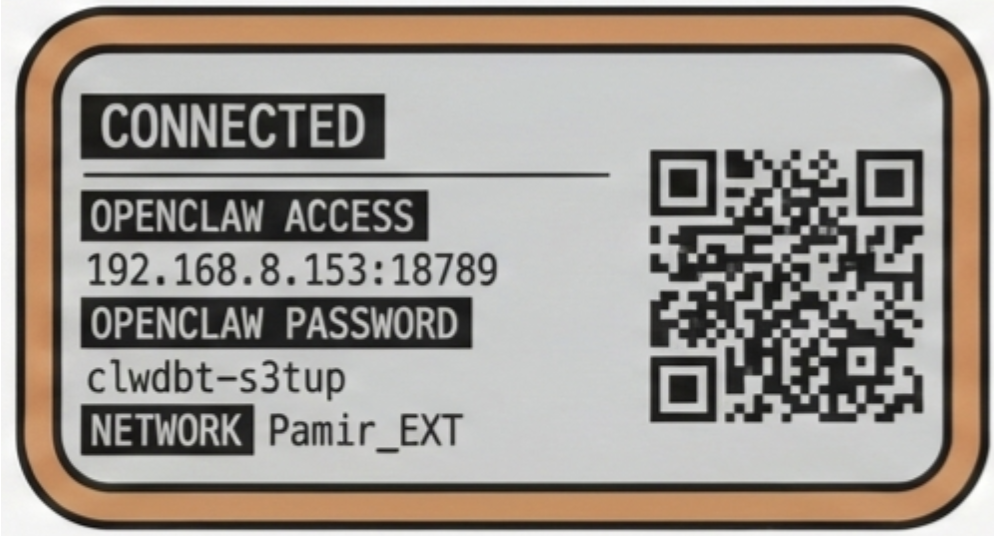 1. Go to Overview tab on the left side
2. Type in the password on the device’s screen
3. Click connect
\_Note: If you get lost with the UI navigation at any point, refer to \_[*this video*](https://www.youtube.com/watch?v=eOzQgOqQ7hk)
### **Connect API Key**
1. Go to **Config** tab
2. Then the **Environment** tab
3. Click **All** at the top
4. Paste in your API key from Anthropic or OpenAI under the **Custom Entries** block
5. Click the red Save button at the top.
> Follow official openclaw setups here to get your API keys: \
> [https://docs.openclaw.ai/providers/anthropic#option-b-claude-setup-token](https://docs.openclaw.ai/providers/anthropic#option-b-claude-setup-token)
Check at this point if you can talk to Clawdbot in the Chat channel.
### **Connect Telegram**
1. Go to Overview tab on the left side
2. Type in the password on the device’s screen
3. Click connect
\_Note: If you get lost with the UI navigation at any point, refer to \_[*this video*](https://www.youtube.com/watch?v=eOzQgOqQ7hk)
### **Connect API Key**
1. Go to **Config** tab
2. Then the **Environment** tab
3. Click **All** at the top
4. Paste in your API key from Anthropic or OpenAI under the **Custom Entries** block
5. Click the red Save button at the top.
> Follow official openclaw setups here to get your API keys: \
> [https://docs.openclaw.ai/providers/anthropic#option-b-claude-setup-token](https://docs.openclaw.ai/providers/anthropic#option-b-claude-setup-token)
Check at this point if you can talk to Clawdbot in the Chat channel.
### **Connect Telegram**
 1. Open Telegram
2. Search for “BotFather”
3. Type “/newbot”
4. Follow instructions to create the bot, its will generate a Token for you
5. Copy the Token.
6. Go back to Clawd Bot and click on Channels
7. Scroll down to find “**Telegram Bot Token**” and paste the token
8. Scroll down and click Save.
9. Now search for your bot that you just named
10. Click on it and copy the Pairing Code from it
11. Go back to Clawd Bot Telegram settings and scroll down to “**Allow From**”
12. Paste the Paring Code
13. Scroll all the way down and click Save.
14. Check if it's working on telegram.
\_Warning : OpenClaw updates like everyday, some of the changes might kill itself, so we recommand you instruct it to perform updates this way : \_
\
`Start the latest version in “sidecar” mode first\
Run it alongside the current production instance (not replacing it yet).`
`Test the “happy path”\
Verify the core/critical user flow works (basic smoke test).`
`If tests pass, do the real update`
> If it truely killed itself (which happens alot lol) , refer to the ssh option below to try to revive it with either claude code or codex :)
## Connect Via Distiller App
> Coming soon ...
## Optional : Access via SSH
```bash theme={null}
ssh distiller@
```
default password : one
## Hardware Reference
For GPIO pin configurations and hardware connections, refer to the pin-out diagram:
1. Open Telegram
2. Search for “BotFather”
3. Type “/newbot”
4. Follow instructions to create the bot, its will generate a Token for you
5. Copy the Token.
6. Go back to Clawd Bot and click on Channels
7. Scroll down to find “**Telegram Bot Token**” and paste the token
8. Scroll down and click Save.
9. Now search for your bot that you just named
10. Click on it and copy the Pairing Code from it
11. Go back to Clawd Bot Telegram settings and scroll down to “**Allow From**”
12. Paste the Paring Code
13. Scroll all the way down and click Save.
14. Check if it's working on telegram.
\_Warning : OpenClaw updates like everyday, some of the changes might kill itself, so we recommand you instruct it to perform updates this way : \_
\
`Start the latest version in “sidecar” mode first\
Run it alongside the current production instance (not replacing it yet).`
`Test the “happy path”\
Verify the core/critical user flow works (basic smoke test).`
`If tests pass, do the real update`
> If it truely killed itself (which happens alot lol) , refer to the ssh option below to try to revive it with either claude code or codex :)
## Connect Via Distiller App
> Coming soon ...
## Optional : Access via SSH
```bash theme={null}
ssh distiller@
```
default password : one
## Hardware Reference
For GPIO pin configurations and hardware connections, refer to the pin-out diagram:
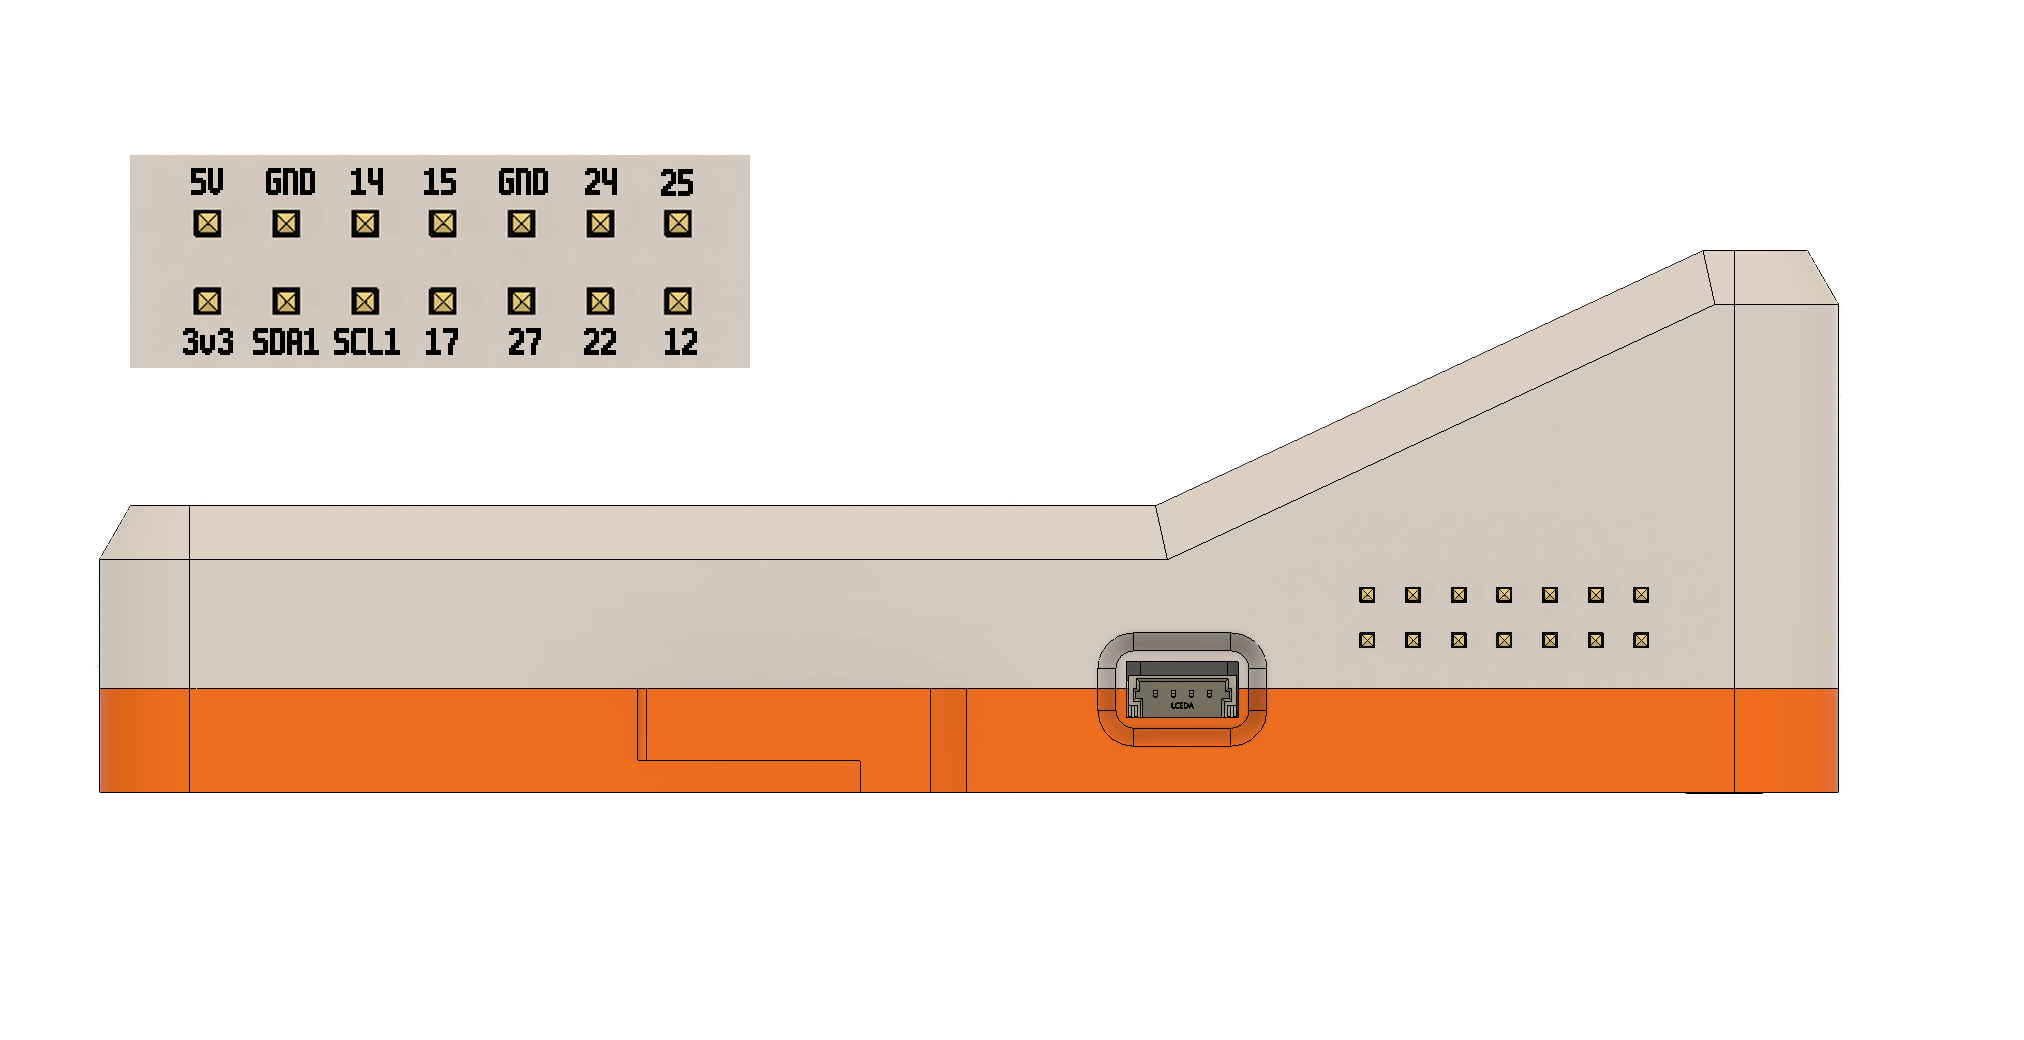 For detailed GPIO pin description, please visit link [here](https://pinout.xyz/)
## Status LED System
The device features status lights that indicate the current state of the Claude Code REPL:
| LED Color | Status | Description |
| ---------- | ------------------------ | -------------------------------------------------------------------------- |
| **Yellow** | Request Acknowledged | Claude has received and acknowledged your request |
| **Blue** | Tool Execution / Waiting | Claude is either calling a tool or waiting for user permission |
| **Green** | Tool Completed | A tool call has returned results and Claude is proceeding to the next task |
### Monitoring Workflow
* **Yellow**: Your request is being processed
* **Blue**: Claude is actively working or requires permission
* If the LED stays blue for an extended period, Claude may be waiting for user approval
* **Green**: Task completion, Claude is moving on to the next operation
This LED system allows you to monitor Claude's progress without constantly checking the terminal, letting you work hands-free while staying informed about the system status.
For detailed GPIO pin description, please visit link [here](https://pinout.xyz/)
## Status LED System
The device features status lights that indicate the current state of the Claude Code REPL:
| LED Color | Status | Description |
| ---------- | ------------------------ | -------------------------------------------------------------------------- |
| **Yellow** | Request Acknowledged | Claude has received and acknowledged your request |
| **Blue** | Tool Execution / Waiting | Claude is either calling a tool or waiting for user permission |
| **Green** | Tool Completed | A tool call has returned results and Claude is proceeding to the next task |
### Monitoring Workflow
* **Yellow**: Your request is being processed
* **Blue**: Claude is actively working or requires permission
* If the LED stays blue for an extended period, Claude may be waiting for user approval
* **Green**: Task completion, Claude is moving on to the next operation
This LED system allows you to monitor Claude's progress without constantly checking the terminal, letting you work hands-free while staying informed about the system status.