- SDK: GitHub - Pamir-AI/distiller-cm5-sdk (BHV branch)
- Python Source Files: GitHub - Pamir-AI/distiller-cm5-python (BHV branch)
First Time Setup
Note: If we set up the device for you at the booth, you can skip this section. This is only for badges with disconnected batteries.To set up the device for the first time, you need to connect the battery to the board. This requires disassembly:
- Use the provided Phillips screwdriver to remove the two screws on the back
- Take the battery wire and quickly insert it into the battery connector
- The connector only goes in one way, so you cannot mess up the orientation
Verification
✅ Success: When the battery is inserted, the LED turns on briefly and then turns off. This confirms successful battery connection. ⚠️ Warning: If any light stays on after battery insertion, the setup was incorrect. Please repeat the process.Quick Start Guide
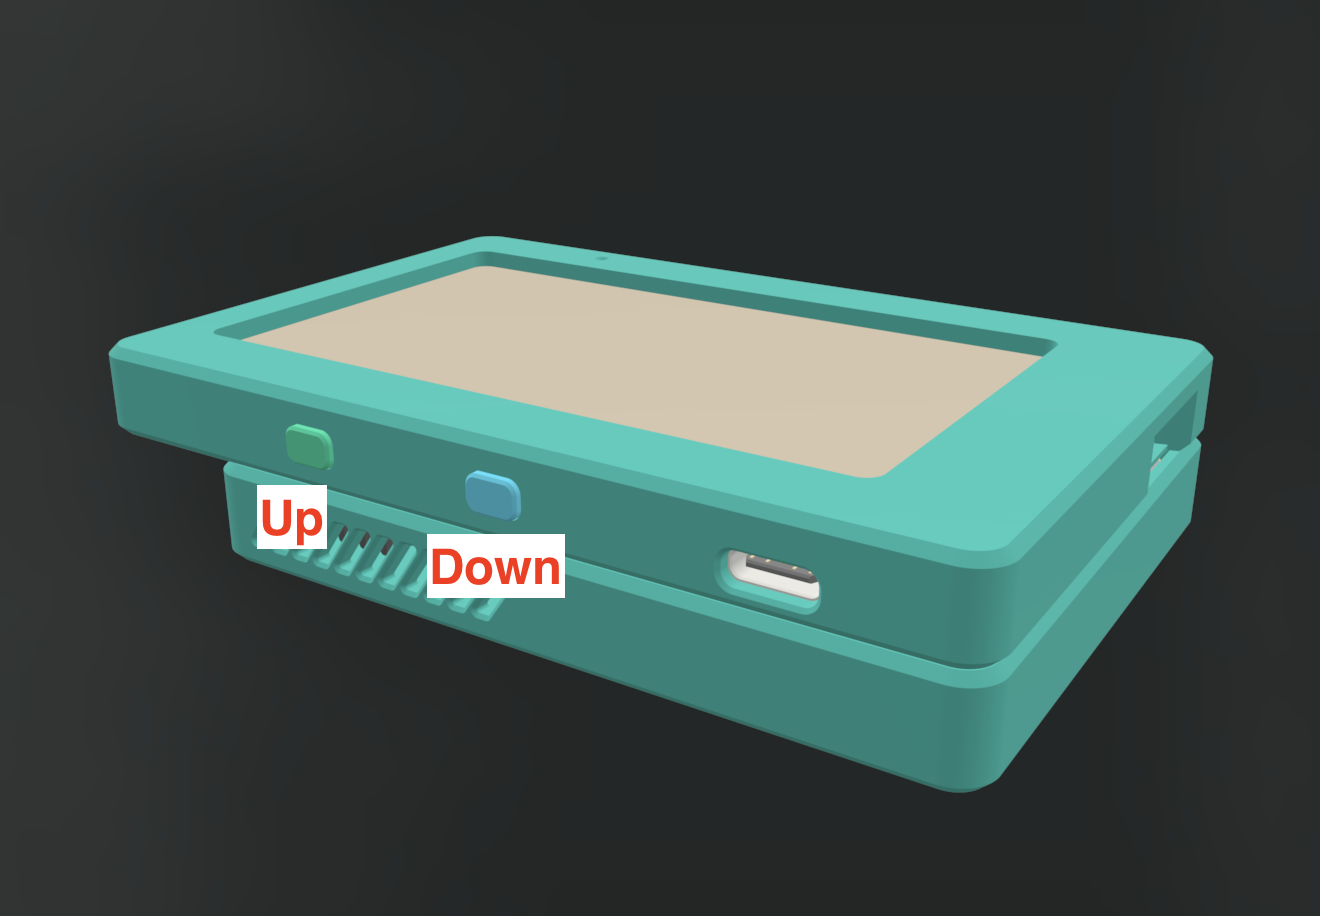
The main display is an e-ink screen that does not support touch input. Navigation uses the physical buttons:- Left buttons: Up and down navigation
- Right button: Enter/select
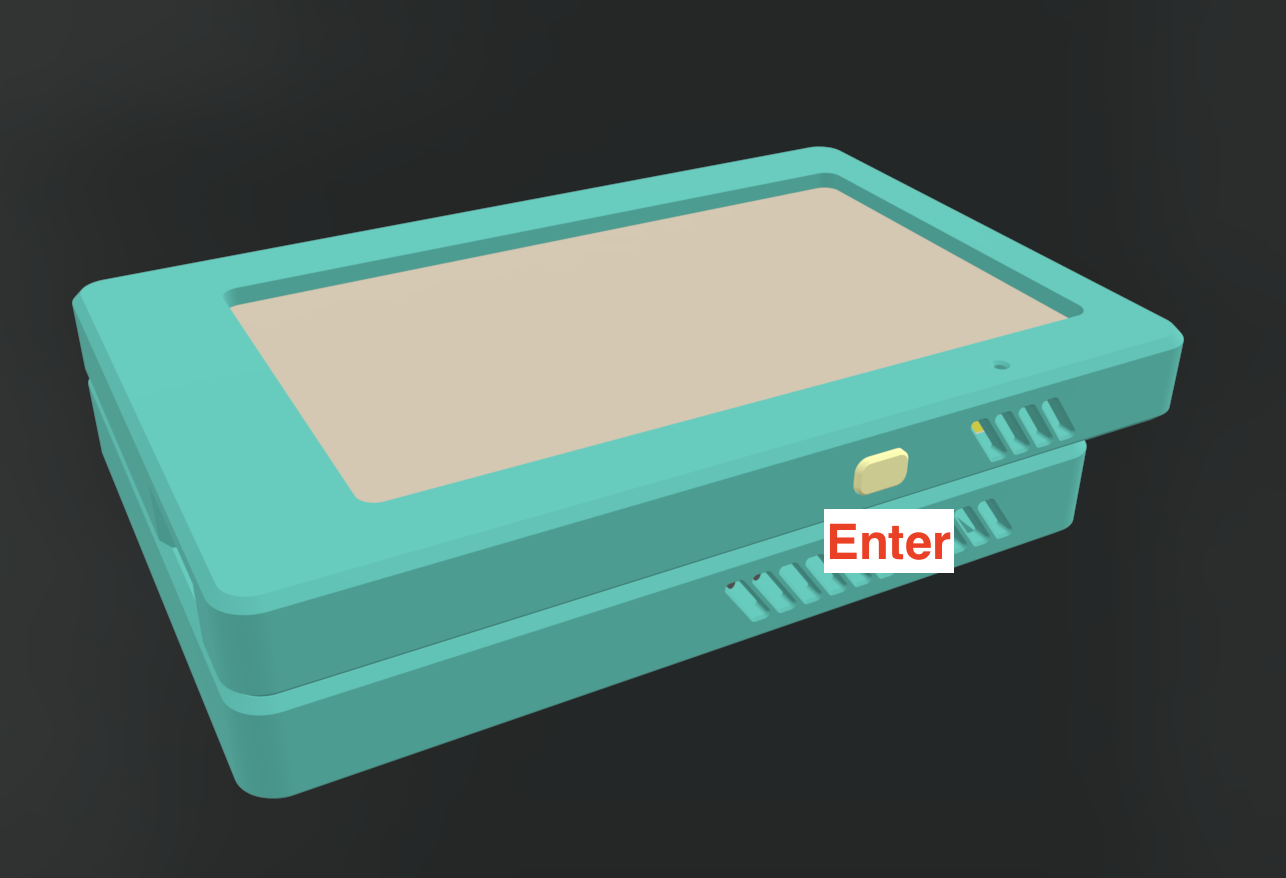
Powering On
- Press and hold the enter button
- Flip the badge to its back
- Observe the back LED turn on
- Release the enter button
Force Power Off
⚠️ Emergency use only - Use this only if the device becomes unresponsive. For normal shutdown, see the next section.
Hardware Overview and Peripherals
The badge is powered by a Raspberry Pi Compute Module 5 - essentially a full Raspberry Pi in half the size. Our custom PCB adds the following functionality:1. RP2040 Microcontroller
A Raspberry Pi Pico acts as the board manager, handling:- Button inputs
- LED control
- Battery charging and status
- Power management
- Learn how to hack it with our SDK
2. Audio Input
Built-in microphone enables voice interaction with the onboard LLM.3. SD Card Slot
Unlike standard Raspberry Pi setups, this slot serves as storage expansion rather than OS loading.4. E-ink Drivers
Physical voltage boost circuit and tri-state buffer enable e-ink display control from both the microcontroller and Raspberry Pi 5.5. Colored LEDs
Set colors using the AI assistant through the UI (covered in later chapters).6. GPIO Headers
Standard Raspberry Pi GPIO headers are available on the PCB. To access them:- Remove the two screws from the back
- Set aside the battery
⚡ Charging Your Device
Charger Compatibility
The Distiller BHV edition is a battery-powered distiller that requires a specific type of charger to function properly. Use a USB Power Delivery (PD) charger with the following specifications:- Voltage: 9V
- Current: 3A minimum
- Port: USB-C
Charging Status Indicators
When you connect a compatible charger to the USB-C port:- LED Status: The onboard LED will turn red to indicate charging is active
- Display: The E-ink display will not show battery percentage during charging
🔋 Battery Management
Critical Battery Level (Below 1%)
When your device’s battery drops below 1%:- The distiller will automatically shut down to protect the battery
- An information screen will appear before shutdown
- Device will not turn on while battery remains below 3%
- Exception: You can power on the device by long-pressing the power button when a compatible charger is connected, regardless of battery level
Low Battery Warning (Below 5%)
When battery level is between 1% and 5%:- A low battery warning screen will display
- You can still power on your distiller normally
- Recommendation: Charge the device before attempting to use it for optimal performance
Quick Troubleshooting
Can’t turn off the side RGB LED? The side firing LED will stay on after shutdown for people show off their badges during DEFCON. To properly turn of the RGB led, please use the “badge_ai” from the main menu and ask it to turn it off. If this still not working, please shutdown the device and reinsert the battery. Button got stucked? To get unstucked temporarily, press the button from the side away from the screen. Issue is due to 3D printing tolerence issue. To solve this issue permanently, use a file to file away the button slots. Device won’t turn on:- Check if battery is below 3%
- Connect a compatible 9V/3A USB-C charger
- Try a long press on the power button
- Remove the following components:
- Battery
- CM5 (the green compute module)
- USB-C cable
- Reinsert the components in this order:
- Insert the battery
- Insert the CM5 gently but firmly. Make sure both connectors click into place — you should hear two audible clicks.
- Do not connect the USB-C cable yet.
- Power On:
- Long-press the Enter button to boot the device.
- Verify charger supports USB Power Delivery
- Ensure charger provides 9V/3A output
- Check USB-C cable connection
Advance User Guide
Access Raspberry Pi Inside
To access, first configure the wifi using the wifi setup page from the main ui. Then scan the QR code on your phone to setup the wifi. Once connected, the device ip will be shown on the screen.To ssh into the device. use the following command