Get Started
Device Setup and Usage Guide
What to do once you receive the device
Power Setup
To power on the device, connect it to the provided power supply using the first USB-C port on the left side of the device. Power Requirements:- Minimum 27W power supply
- 9V at 3A output
- Use only the leftmost USB-C port for power
Initial Network Setup
First-Time WiFi Configuration
- When the device has never been connected to your network, it will automatically prompt you to scan a QR code
- Scanning this QR code opens a website where you can enter your WiFi network credentials
- Complete the setup process by entering the desired network information
- Once setup is complete, the device will connect to the network and display a new QR code
Accessing the Web Interface
After initial setup, scan the new QR code displayed on the device screen. This will redirect you to the device’s web interface.Project Management
The web interface provides a GUI for easy project creation and management:- Create new projects through the graphical interface
- All projects are created in the
projectsdirectory located inside the home directory - Open dedicated terminal sessions (tmux) for each project
- Support for multiple terminals per project or working on different projects simultaneously
- Sessions are persistent as long as the device is powered on
- Work on projects directly from the terminal environment
Mobile Access
You can switch to your phone to continue working when you need to step away from your laptop. The mobile UI is still a work in progress, but remains very usable for most tasks.File Management
The web interface includes a built-in file explorer that allows you to:- Browse project files and directories
- Download files to your local device by right-clicking and selecting download
- Conveniently transfer files between the device and your local machine
Claude Code Integration
The device comes with Claude Code pre-installed and ready to use. Important: Always usedistiller-cc instead of the standard claude command. The distiller-cc wrapper automatically loads the entire hardware SDK context, enabling you to ask questions about the hardware directly without needing to reference documentation manually.
Standard Mode
Launch Claude Code from any directory using:claude command that:
- Sets up a default Claude Code environment with custom permissions configured for optimal security
- Automatically loads comprehensive hardware SDK documentation into context
- Enables direct hardware-related questions and programming assistance
Hardware Reference
For GPIO pin configurations and hardware connections, refer to the pin-out diagram: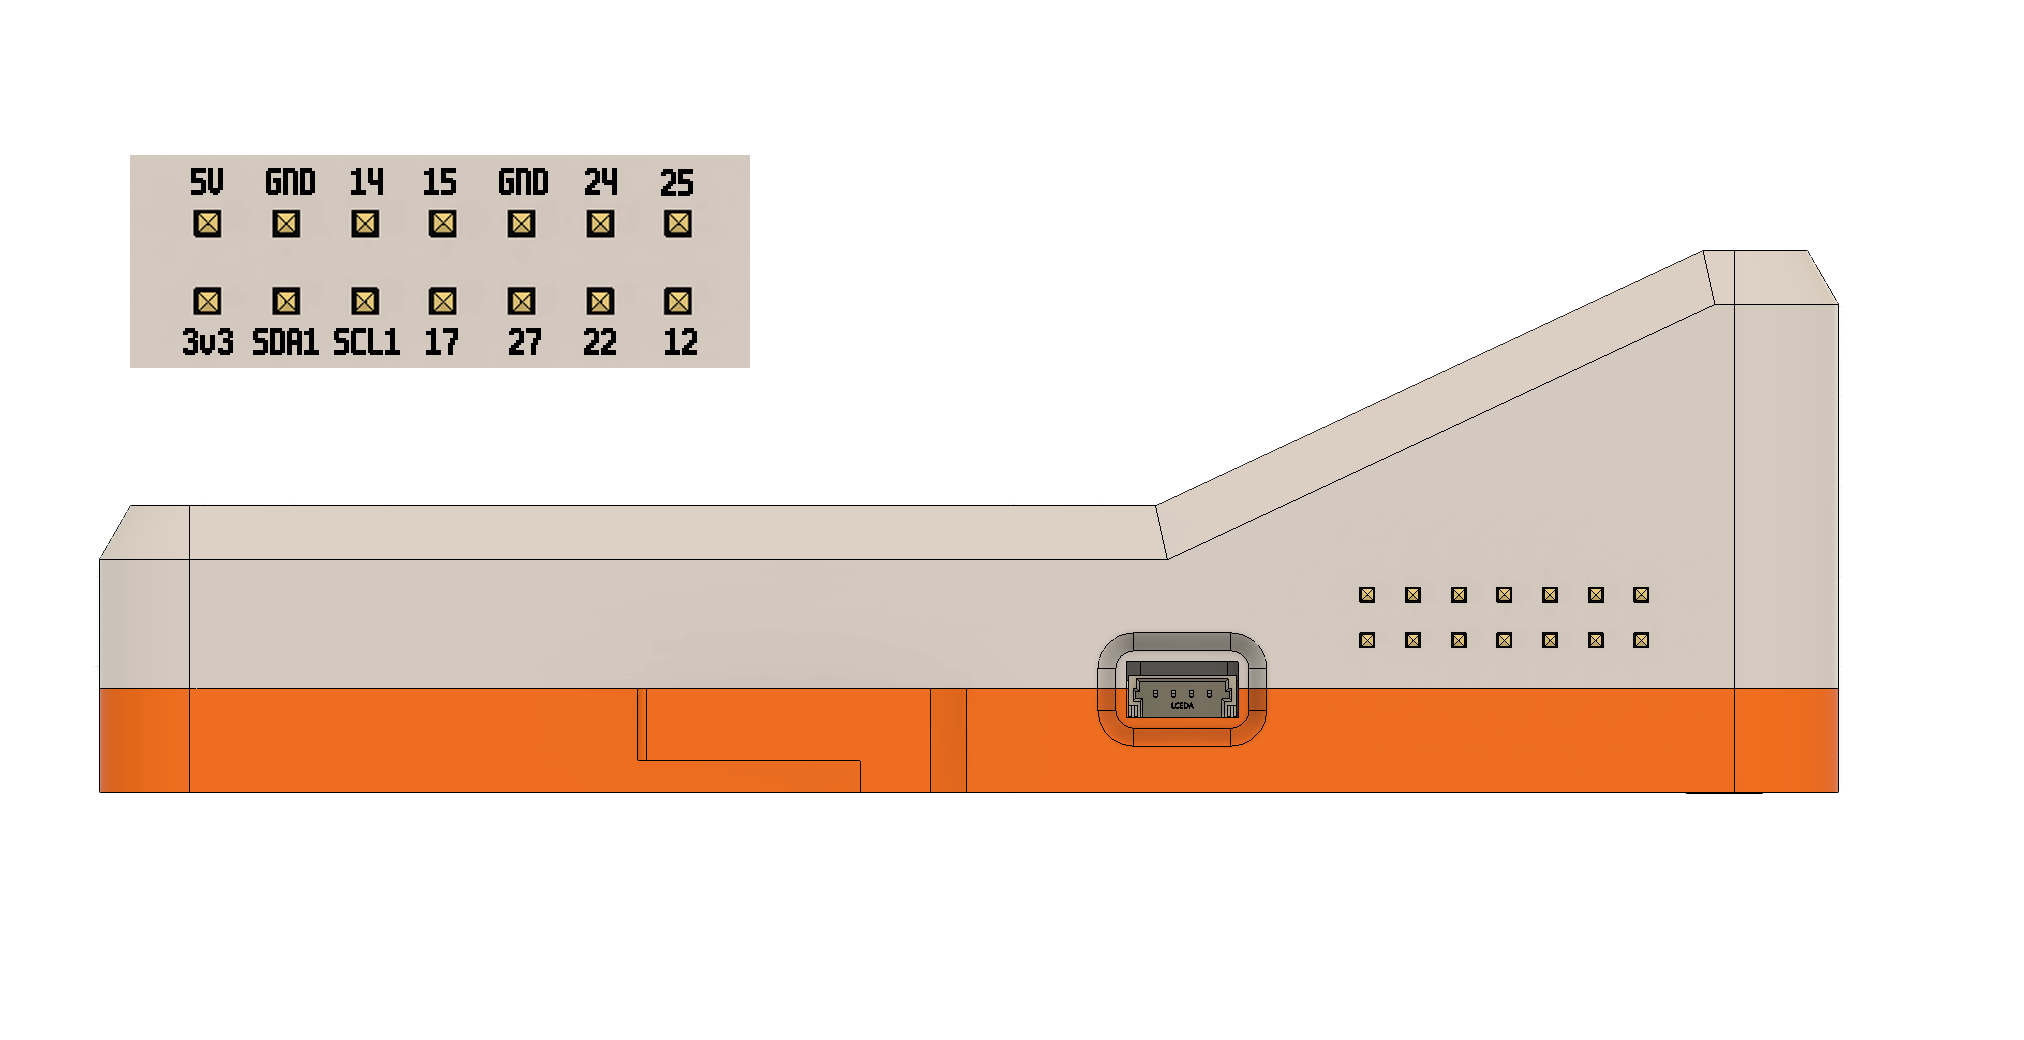 For detailed GPIO pin description, please visit link here
YOLO Mode
For advanced users who want fewer restrictions:Status LED System
The device features status lights that indicate the current state of the Claude Code REPL:| LED Color | Status | Description |
|---|---|---|
| Yellow | Request Acknowledged | Claude has received and acknowledged your request |
| Blue | Tool Execution / Waiting | Claude is either calling a tool or waiting for user permission |
| Green | Tool Completed | A tool call has returned results and Claude is proceeding to the next task |
Monitoring Workflow
- Yellow: Your request is being processed
- Blue: Claude is actively working or requires permission
- If the LED stays blue for an extended period, Claude may be waiting for user approval
- Green: Task completion, Claude is moving on to the next operation